Solana/更多开发者工具/web3.js 快速上手
我们开发了一个简单的 dapp, 演示如何使用 solana/web3.js 为我们的 on-chain program 提供前端交互功能. 你可以参考并扩展到自己的项目中. 本文使用的例子是使用 react + vite 的前端, 连接 phantom 钱包, 并通过上节课介绍的基于 pinocchio 的数据存储程序来读写 pda 数据.
项目地址仍然位于 https://github.com/mohanson/pxsol-ss-pinocchio.
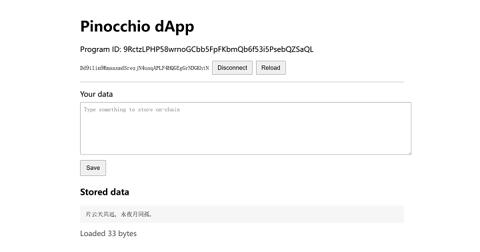
为了方便读者们学习, 我已经将该项目部署到 solana 主网上, 程序地址是 9RctzLPHP58wrnoGCbb5FpFKbmQb6f53i5PsebQZSaQL, 你可以直接使用该程序进行测试.
在部署程序时作者因为失误发生了数次错误, 总共花费了大约 1.5 sol 的手续费才完成了部署, 也就是大约 300 美元, 请大家未来在操作主网时务必小心谨慎, 避免不必要的损失.
作者的碎碎念
我本身并非前端工程师, 对前端的了解仅仅限于能做出一个简单的 demo, 但我觉得 web3.js 的学习曲线并不陡峭, 只要你有一定的前端基础, 并且了解 solana 的基本概念, 就能很快上手.
另外现在的 ai 非常强大, 我在写本文的前端代码时大量使用了 github copilot 和 chatgpt, 这些工具能极大地提高开发效率, 但也会带来一些问题, 例如生成的代码可能并不完全正确, 需要你有一定的判断能力来辨别和修正错误. 所以我建议大家在学习和使用这些工具时, 不要完全依赖它们, 而是要结合自己的理解和经验.
在此处我只介绍最核心的代码片段, 以及一些需要注意的点. 如果你想了解完整的代码, 请参考项目源码.
建立连接
import { Connection, PublicKey } from '@solana/web3.js'

export const PROGRAM_ID = new PublicKey('9RctzLPHP58wrnoGCbb5FpFKbmQb6f53i5PsebQZSaQL')
export const RPC_ENDPOINT = import.meta.env.VITE_SOLANA_RPC
  || 'https://api.mainnet-beta.solana.com'

export const connection = new Connection(RPC_ENDPOINT, 'confirmed')
连接浏览器里的 phantom 钱包
import type { Transaction } from '@solana/web3.js'

type PhantomProvider = {
  isPhantom?: boolean
  publicKey?: PublicKey
  connect(opts?: { onlyIfTrusted?: boolean }): Promise<{ publicKey: PublicKey }>
  disconnect(): Promise<void>
  signTransaction(tx: Transaction): Promise<Transaction>
}

declare global { interface Window { solana?: PhantomProvider } }

export async function connectPhantom(): Promise<PublicKey> {
  if (!window.solana?.isPhantom) throw new Error('Phantom not found')
  return (await window.solana.connect()).publicKey
}
派生程序扩展账户
前端需保持和链上程序相同的派生种子:
import { PublicKey } from '@solana/web3.js'

export async function deriveDataPda(user: PublicKey): Promise<[PublicKey, number]> {
  return PublicKey.findProgramAddress([user.toBuffer()], PROGRAM_ID)
}
读取账户数据
import { Connection, PublicKey } from '@solana/web3.js'

export async function fetchUserData(conn: Connection, user: PublicKey): Promise<Uint8Array | null> {
  const [pda] = await deriveDataPda(user)
  const info = await conn.getAccountInfo(pda, { commitment: 'confirmed' })
  return info ? info.data : null
}

export function decodeUtf8(data: Uint8Array | null): string {
  return data ? new TextDecoder().decode(data) : ''
}
构造写入指令
import { TransactionInstruction, PublicKey, SystemProgram } from '@solana/web3.js'

export async function buildWriteIx(user: PublicKey, payload: Uint8Array): Promise<TransactionInstruction> {
  const [pda] = await deriveDataPda(user)
  return new TransactionInstruction({
    programId: PROGRAM_ID,
    keys: [
      { pubkey: user, isSigner: true, isWritable: true },
      { pubkey: pda, isSigner: false, isWritable: true },
      { pubkey: SystemProgram.programId, isSigner: false, isWritable: false },
    ],
    data: payload,
  })
}
备注: 若你项目里需要 Buffer, 可使用 data: Buffer.from(payload), 并 import { Buffer } from 'buffer'.
发送交易并确认
import { Connection, Transaction, TransactionInstruction, PublicKey } from '@solana/web3.js'

type PhantomProvider = { signTransaction(tx: Transaction): Promise<Transaction> }

export async function sendAndConfirm(
  conn: Connection,
  user: PublicKey,
  ix: TransactionInstruction,
  wallet: PhantomProvider,
) {
  const tx = new Transaction().add(ix)
  tx.feePayer = user
  const { blockhash, lastValidBlockHeight } = await conn.getLatestBlockhash('finalized')
  tx.recentBlockhash = blockhash

  const signed = await wallet.signTransaction(tx)
  const sig = await conn.sendRawTransaction(signed.serialize(), { preflightCommitment: 'finalized' })
  await conn.confirmTransaction({ signature: sig, blockhash, lastValidBlockHeight }, 'finalized')
  return sig
}
运行
您可以在本地运行该前端项目:
$ npm run dev
# Open http://localhost:5173
# Connect Phantom wallet and save/load data.
或者直接访问我们部署好的线上版本: https://pxsol-ss-pinocchio.vercel.app/.
首先点击 connect 连接钱包, 然后在输入框中输入任意字符串, 点击 save 保存到链上, 再刷新页面, 即可读取刚才保存的数据.